Phantom Project
What I am doing here is making Phantom but it is kind of a custom job. Everything you will see here was collected piece by piece. Like I said originally, I found some fenders for a killer price and decided to build a Phantom around them. The
frame is actually a 1950 B6 frame. All the rest of the parts either came from eBay or my usual suppliers. I think about the only thing I don't have is the lense for the fender light. Some parts will be reproduction and some will be original. Some parts
will need chroming or rechroming and others I will leave as is. Hopefully you will come away with a better understanding of what goes into a "restoration" or building of a bike. Keep in mind, my way is not the only way to do things. It is just my
way of doing things. You might have a better way, feel free to share your idea's with me. You might have a question or need a better explaination from me, feel free to ask. Just remember that I am going to do what is most comfortable for me. Hopefully,
we will both enjoy the process. Otherwise, what's the point! So let's begin!!
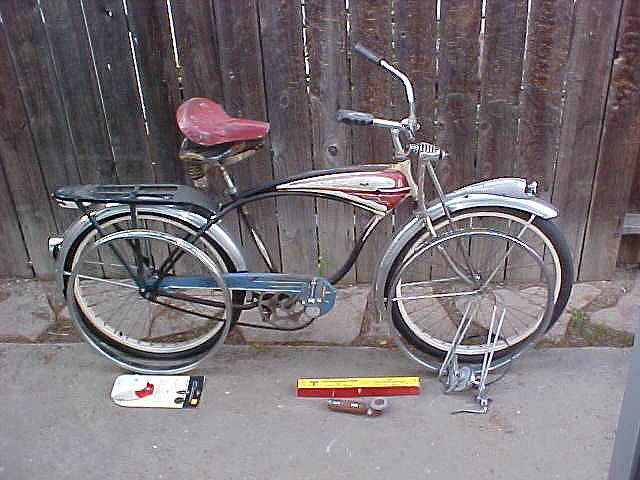 So here it is. The painted rims on it now are TOO nice, so I found some actual Phantom rims that need rechroming. Those painted ones came from Bob Pavao. The tank is smooth enough to rechrome.
I got the tank from Dan Venturi of Bicyclebones. He also supplied the frame with headbadge. The rest came from eBay or Yahoo auctions. I have a nice original Phantom seat core that needs recovering. I have reproduction rear
reflector and tailight with stoplight switch. The jury is out on whether the rack is repro or not. I'm starting to think it is original. The chainguard came off of an old Panther or Hornet. The crank and chainwheel are original and will most likely get rechromed.
I'm still not sure whether or not I will use the forebrake or not, I do have plenty of "script" hubs. The forebrake is a high / low flange and required major metal surgery just to look like it does! Plus the handle for it is a non-script. The pedals are Phantom
aftermarket. Well, it is bolted together, everything fits, and it rides. So I think we are ready to go! The next step will be to disassemble, obtain the little parts that are needed ( I think I need a lower headset cup for the locking springer ), map out the paint
scheme, throw the painted parts into a degreaser and then into a blaster for paint removal. Stay tuned!!
So here it is. The painted rims on it now are TOO nice, so I found some actual Phantom rims that need rechroming. Those painted ones came from Bob Pavao. The tank is smooth enough to rechrome.
I got the tank from Dan Venturi of Bicyclebones. He also supplied the frame with headbadge. The rest came from eBay or Yahoo auctions. I have a nice original Phantom seat core that needs recovering. I have reproduction rear
reflector and tailight with stoplight switch. The jury is out on whether the rack is repro or not. I'm starting to think it is original. The chainguard came off of an old Panther or Hornet. The crank and chainwheel are original and will most likely get rechromed.
I'm still not sure whether or not I will use the forebrake or not, I do have plenty of "script" hubs. The forebrake is a high / low flange and required major metal surgery just to look like it does! Plus the handle for it is a non-script. The pedals are Phantom
aftermarket. Well, it is bolted together, everything fits, and it rides. So I think we are ready to go! The next step will be to disassemble, obtain the little parts that are needed ( I think I need a lower headset cup for the locking springer ), map out the paint
scheme, throw the painted parts into a degreaser and then into a blaster for paint removal. Stay tuned!!
Well, we have a good start. All the parts fit correctly and work correctly. Time to disassemble.
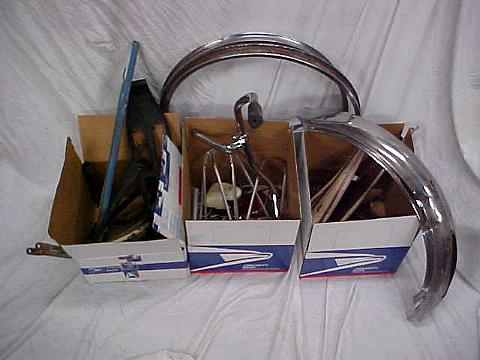
So here is what this bike was turned into. The box on the left is small parts that need to be blasted and painted. The middle box are parts that are okay just the way they are. No plating or painting necessary. The box on the right is stuff that has to go to the plater along with the rims and fenders.
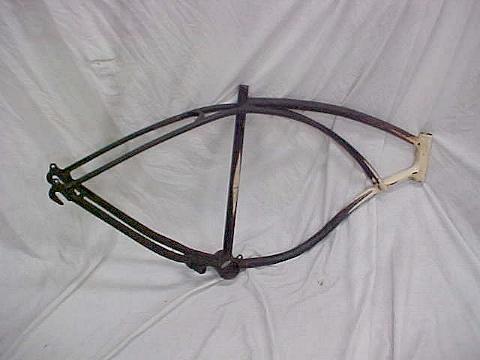
And here is the bare frame. But were not ready to blast it just yet. Most of the grease and dirt have been wiped down. This helps make the old paint and decals clear.
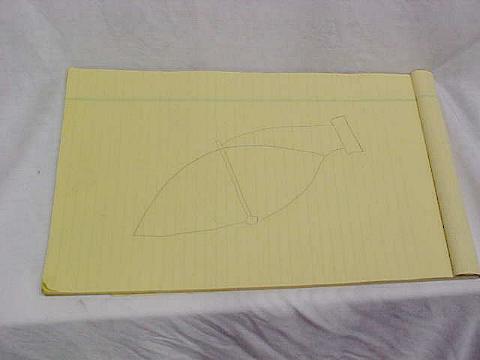
Next I get out a note pad and draw a basic frame. Time to map out the graphics and where the decals go. You want to do the same with the tank and the chainguard. Last chainguard I did on my 1955 Cycletruck, I stuck directly into a copy machine so I had a 1:1 scale of it. You could probably do the same with the tank too.
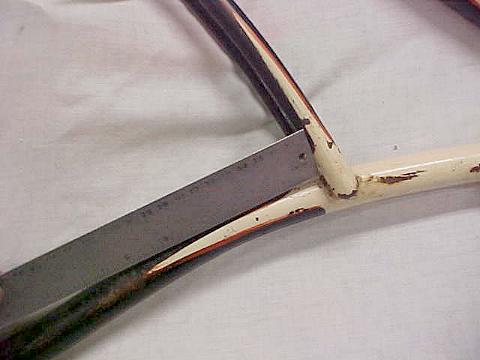
Measure out where one color begins and the other ends. Pick out a reference point and mark it on the note pad. Measure where the original decals go. Note the thickness of the pinstripes and how far they extend past the color seperation. Write EVERYTHING down. Even if you think you might remember it later, you probably won't!!
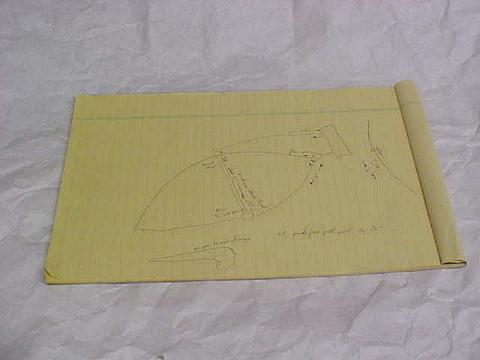
Scribble as much as you need. Do the forks, chainguard and anything else you can think of. Note all of the little things and make as many notes as you need. Lucky for us, most of the business is toward the front of the frame. A lot less mapping to do compared to the 1955 Cycletruck I did. That bike had pinstriping from front to rear and in between!!
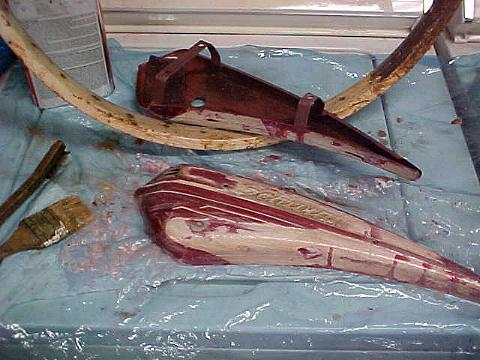
Don't tell my wife that I am doing this on her washing machine!! Here is a secret. Make life easy for your plater. Instead of letting him sand off all the paint and stuff, do as much as you can. Most of what you are paying for when you get things chrome plated, is the labor!! The less work he has to do to get a smooth surface to start with, the less he will charge you!! Here I am stripping the paint on the tank. This way is messy, but I will be left with smooth steel. Sure it is quicker to sandblast it, but then my plater has to sand the metal to get it smooth. See!
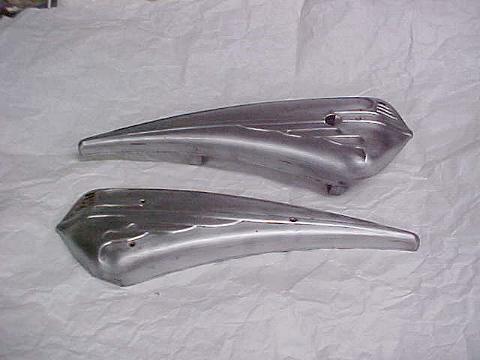
Ah! So much better! I bumped out all the little dents and sanded them smooth. I think this tank is ready for the plater!!
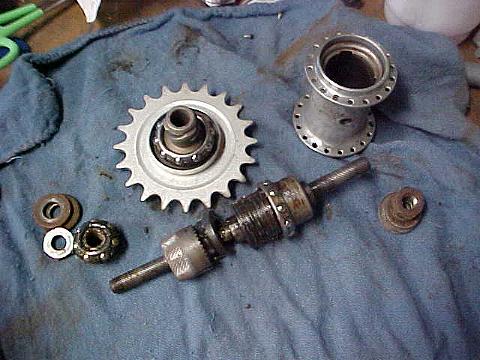
Okay, the frame and other painted parts are ready to go into the sandblaster. It will be a while until I can get to the blast cabinet, so those parts are set aside. But, there is plenty of other work to do. Clean and examine your hub parts. Break them down completely and figure out which parts you want to plate. I have a NOS cog so that won't need plating. But the hub housing, the dust cover under the brake arm and the brake arm itself will get plated, so in the box they go!
Since it will be a little while until I can get to the sandblast cabinet, I have been degunking and degreasing all of the parts to go to the plater. I stripped a painted rim because I didn't like the looks of one of the original rims that I wanted to send to the plater. I have been checking parts for straightness like the chainwheel, crank and fenderbraces. You will have a lot less headache if you do all this before you send the stuff to the plater, rather than finding blemishes after you have a bright shiny piece!
Usually a plater can take 2-3 weeks, depending on how busy he is. So after all this prep, take your parts to be plated in. You can use that time period, where your stuff is being plated, to strip your painted parts, prep and paint them. That way, by the time your parts are ready at the plater, your paint will have cured and you can start assembly. But I'm getting way ahead of myself. Back to degreasing and checking for straightness!
Phantom Project Page Two
Phantom Project Page Three
Phantom Project Page Four
Phantom Project Page Five
BUNCH "O" BIKES
BUNCH "O" BIKES UNDER CONSTRUCTION
BUNCH "O" BIKES NO LONGER WITH US
REPAIR AND RESTORATION TIPS
COOL LINKS
STUFF FOR SALE
Questions? Suggestions? Send an email
This Page Copyright (©)1999-2002 By MNSmith