Quick Tutorial / How To Do A Camaro Clip On An Old AD Truck!
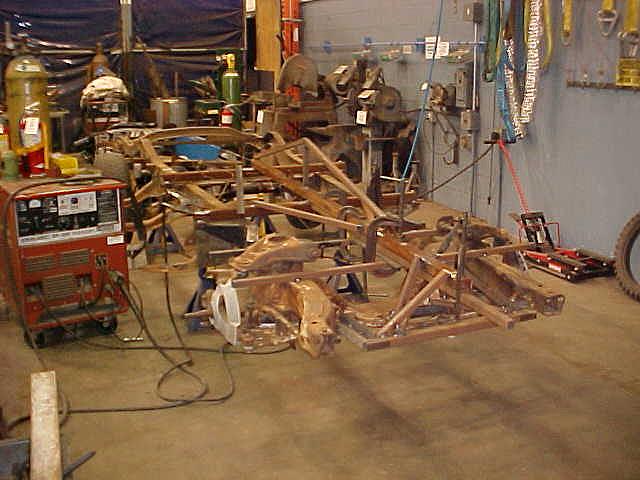
Looks pretty scary, huh?? Not really. A lot of work involved but nothing an ordinary Joe with ordinary skills can do!! I've been asked a few times
how I did my clip. There is actually a couple of places on the web that I have found that help explain what to do. Hopefully, my explaination will only add
to the information that is already out there. Let's get started!!!!
First, some basics. You need to find a decent donor. Most of those can be found from the late 1960's to the mid 1970's. Mostly Chevy passenger vehicles.
My project used a 1971 Camaro clip. This isn't my first Camaro clip so I am familiar with what is involved using one. You might find a different donor
will work for you. That's fine! Some folks use Nova, some use Chevy vans. That's fine too! This page is about the basics so the methods will apply to all
of these clips. So, one of the basics you should know is that you should inspect your new clip. Look to see if anything has been bent from an accident to a sway bar that has been bent
from a previous tow job. Try to find a donor that is in good shape! Same will go for your old frame. I can't tell you how much a tape measure will be your friend in doing this
job. Check your old frame for straightness. Look for bent things, overall diamond shape, etc. It is important to start with a good foundation in both your old frame and the donor clip!
Okay, enough about the old stuff, let's get to process!!
First thing I did was measure my old spindle center lines with most of the load still on the suspension. I usually draw lot's of pictures with a lot of measurements. Typically
an overhead view and a side view. I measure where that spindle is in relation to where the old frame is and from a point on the old frame that will remain. For this job, I made a jig so
most of my reference points where made from the jig. That was because the jig was going to be attached to the old frame throughout the whole project and not removed until the last component
was welded in. More on the jig later!! Two of the more important measurements you can take at this point how far the spindles are from a point at the back of the frame. Pick a crossmember
or other point that is matched to both sides of the frame and mark down that measurement. The other important measurement is the height of the old spindle center in relation to the top of
your old frame. I know the front of the frame dips down, but if you use a straight edge or a string, you can extend the flat area of the middle of your frame, out over the front. Make sense??
Measure from that point how far down the center of the spindle is. That, basically, is the current ride height for our modification purposes!
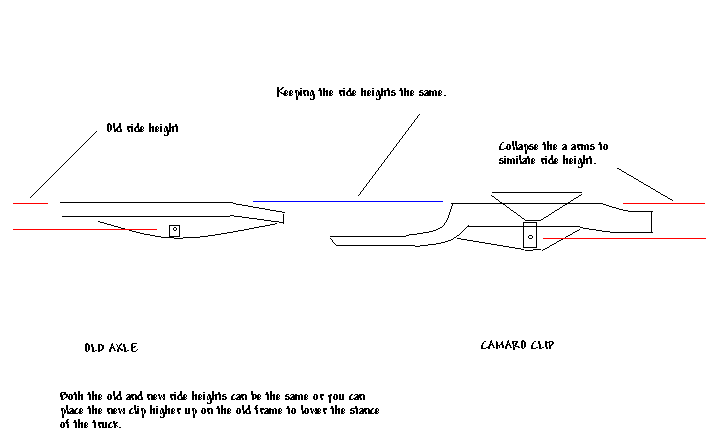
Here is a bit of what I am talking about. Here is why you want to take that measurement. You'll want to get your new clip close to that measurement for a stock height ride, or
you'll want to move that clip measurement "up" to drop your final ride height. Now, you'll want to set up your clip so that it simulates final ride height. That will require some all thread or
some extremely long bolts. In place of the stock Camaro shock, you'll want to rig your all thread in such a way that you can tighten the nuts and collapse the coil springs. That'll
mean a plate under the lower "A" arm and some washers up top. Collapse your spring until your lower "A" arm is horizontal and parallel to the bottom of the clips crossmember. Most of this
can be eyeballed. I found that when I collapsed mine, the measurement from spindle center to the top of the clip frame, was within 1/2" of the old
frame's spindle height measurement! Not bad!! Since I am going for stock height, the top of the old frame and the top of the new clip were going
to be about equal!!
Okay, you know where your old spindle centerlines are at. You know that your clip is at ride height. Now there are a couple of other things to consider. Sheetmetal. If that
stuff isn't hung in the right place, you'll be tring to get it right forever. Same with that front bumper! So, to hang the front sheetmetal right, you'll need to set your radiator support
in the right place. Everything is located with that radiator support. There are a couple of ways to do this. One would be to put your frame up on jacks or blocks. On a level floor,
measure where those holes are located. Is your floor extremely flat? Can you ensure that during this clipping process, your frame's position will never move?? If so,
you can take measurements from the floor and duplicate them later on your new clip. My first clip that I ever did, I did this method. The sheetmetal never did
come out right. I guess something moved during the process.
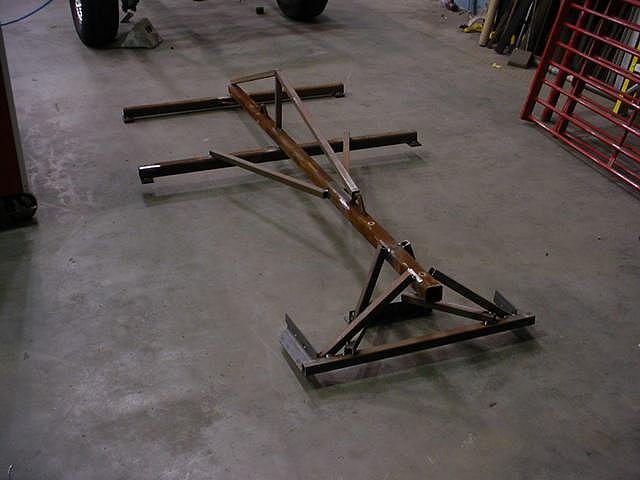
For this job, I made a jig! I used some 2" x 2" thick wall square tubing.
I bolted a piece to the body mount brackets that sit just behind my doors on my 'burb.
I then bolted a similar piece to the front body mount brackets. Since there are a few rivets here and there that need to be cleared, I used a piece of 1/4" flat stock like body
mount pads. After those two pieces were bolted in, I welded a similar piece of tubing in the direct middle of the two cross pieces. I now have the front cross piece as
a fore to aft reference point and the one down the middle for a center of frame reference. The thickwall stuff has very little flex to it. But it does flex. So I took
some scrap and made a truss over the top and triangulated the center piece for side to side movement. Can't be too careful!! After that, I measured where the center
of my original spindles were. All referenced from the front jig cross tube.
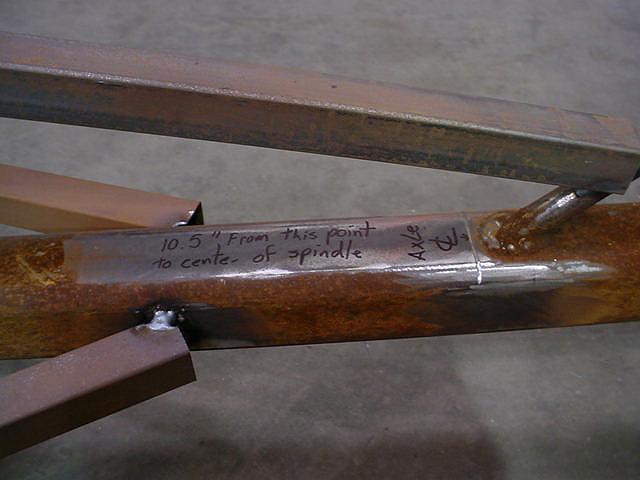
Pens, pencils and the like can all be erased. So I marked the axle centerline on my
jig by grinding a groove with a muffler tool. Ain't gonna loose that mark!! I also noted, from the top of my jig tube, how far down the spindle center was ( ride height measurement.)
This was written down on paper and also in permanent ink next to my centerline mark. Now, to figure out the radiator stuff!
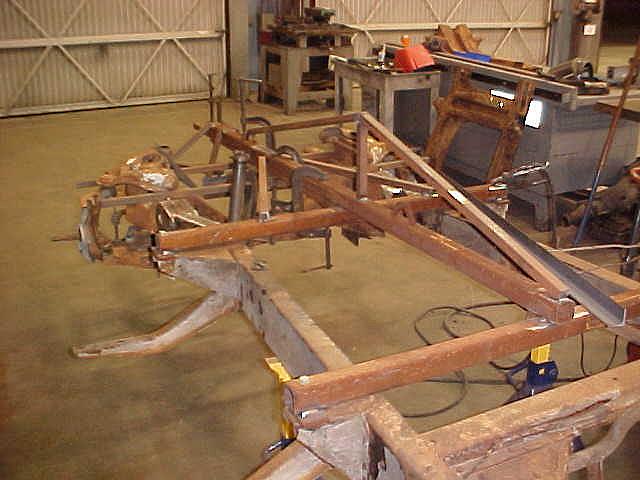
While the original frame was still in place, I took some more scrap, drilled the proper holes and bolted it to the radiator mount and the bumper mounts. Then I took more scrap
and welded bracing to the jig. Once the old frame is cut away and the pieces unbolted, the holes will be located in the correct place, at the correct height and right where they are
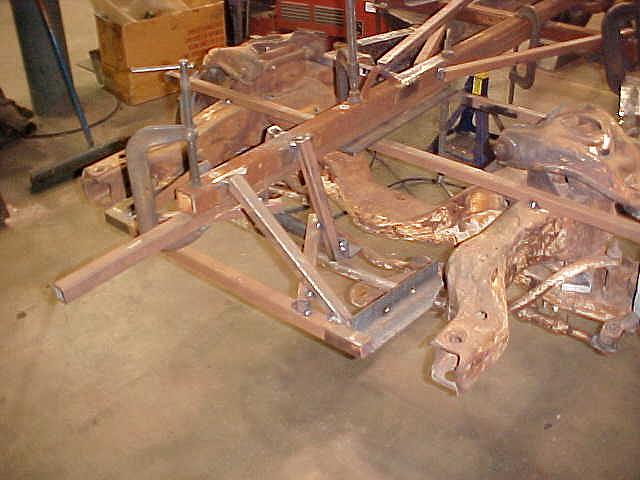
supposed to be!! The jig looks like a dinosaur, but it is supposed to be functional, not pretty! Now, the original frame can be cut away. But where to cut?? Look to your clip.
(Reference the drawing above.) See how the back of the clip drops off? You'll want your cut close to the top ( for stock height ) or a few inches below the top ( for a lower ride.)
Measure where you think you might end up cutting it off. In fact, go ahead and cut it. Just do it equally to both sides. A lot of measuring, eh! I did stress that before!
Now, measure your clips axle center line to your cut. Take that measurement to your orginal frame spindle center line mark on the jig, and measure towards the back of the frame.
Now, take a measurement from the mark to your reference cross member. That's how much frame you want left. Add an inch. Why?? It is easier and better to trim your parts
than to try to add metal cause you cut too much off originally.

Now, you can slide that clip up under the jig to see how things are starting to fit. The measuring tape will be your friend here. Get the new spindle centerline
close to where the old one was. Trim what metal you have to to do this. As everyone knows, an AD frame is narrower than a Camaro clip. I remedied this by
cutting the flanges of the old frame and spreading the pieces to match the clip. Now, start getting really nutty with the measuring. Put the height of the spindles where
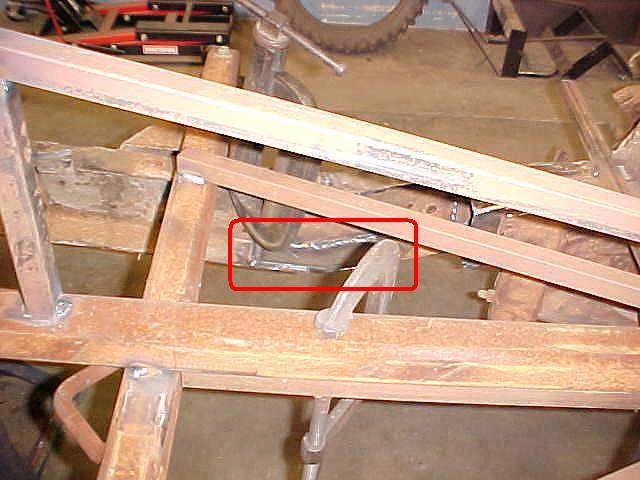
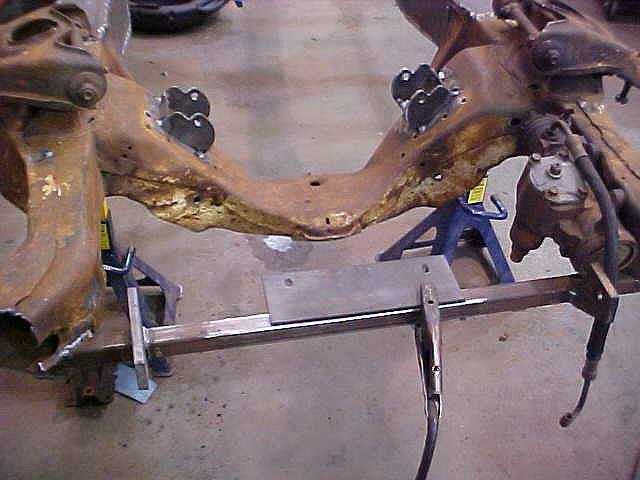
you want them. Match up the fore to aft centerlines. Do some measurement on your diamond shape. I had an easy way to set twist. Directly in front or
and directly behind the "A" arms is a flat area. So I took some 1" square tubing and tacked it across the clip. Gave me a quick reference for level. Plus
I could mark center on them to line the clip up with my jig. Plus, with the proper spacers, I could clamp those pieces directly to my jig to help hold it level and
in place while I welded the clip in.

Here is a bad picture of those two pieces. Once everything measures out and is in place, you can start tacking!
So, the old frame is widened out and the clip is ready to weld in. Tack it in a few spots on both sides. Remeasure everything. Still in the
same place?? Get a little more serious with your welding. Butt weld wherever you can. Where pieces overlap, weld those too! If nothing has moved (again),
then it is time to start strengthening everything.
Remember we had to cut to widen the old frame? Well those cuts opened up to a "V". Cut some plate, 1/8" is good, 3/16" is better! Make
a butterfly shape. But make it narrow enough so that when you put the inner gusset plate, it will rest against this piece and you will semi "box" the frame.
The inner gusset plate will be a partial box on the old frame, stretching from the clip to just about the front mount bracket.
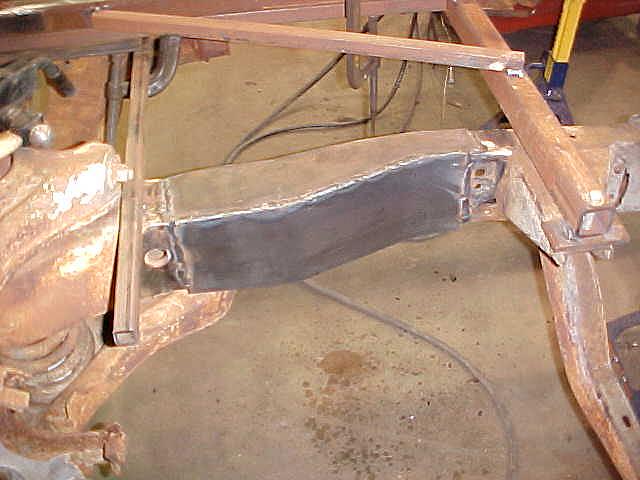
Now you can start "wrapping" the joint. I started with the top piece. Weld it inside and out. Inside the old frame, where things overlap. Then make a bottom
piece and do the same, inside and out. Then I did the outside piece, using big clamps to make it form to the shape of the joint. Last piece was the inner
piece. This one I make as long as possible. From just around the lower "A" arm mount to just past the front body mount.
After all that, it's time to get the front mounts. By the way, along the way you might have to trim the jig to fit things. As long as there are
no major changes, everything should be fine. For the mounts, make what plates you are going to use to mount the radiator and the bumper. Bolt them to your jig.
Weld in whatever support, cross member pieces you need to make them permanent. As you can see, the bumper plate on the right had to be modified to fit
the steering box. The radiator mount shell will need this kind of attention, too. Also, as you can see, the radiator mount plate was a pretty straight
forward installation. The cross member for that plate sits back that far because of where the sway bar mounts. Once the crossmember is welded in,
the leftover front Camaro horns can be cut off. This area will be mostly hidden by the front fenders when they are installed.
Should we get into engine placement??
Questions? Send an email
This Page Copyright (©) 2006